An estimate lets you quote a project before you start work. You can add task and expense line items, send the estimate to your client, and convert it into an invoice when the work is done.
Build an estimate
Click Estimates in the navigation bar.
Click New Estimate.
Select a Client from the dropdown.
Confirm the Issue Date. The system sets today's date by default.
The Estimate # is assigned automatically. Change it if you need a different number.
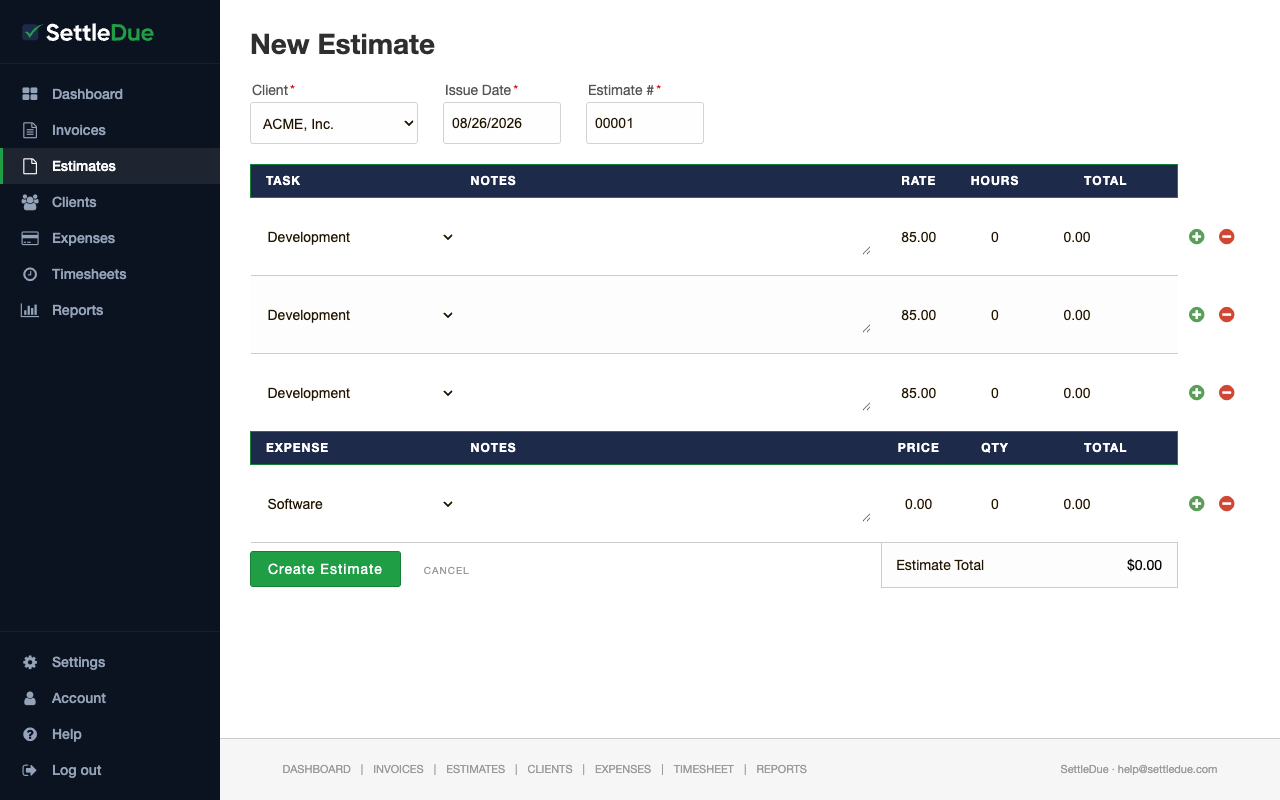
The New Estimate form with task and expense line items.
Add line items
The estimate has two line-item sections: Tasks and Expenses.
Task line items
Select a task type from the Task dropdown (for example, Development or Meetings).
Add a description in the Notes field.
Set the Rate and Hours. The system calculates the total automatically.
Click the + button to add more task rows. Click − to remove a row.
Expense line items
Select a category from the Expense dropdown (for example, Software or Hosting).
Add a description in the Notes field.
Set the Price and Qty. The system calculates the total automatically.
Click the + button to add more expense rows.
The Estimate Total updates as you add or change line items.
Review the estimate total at the bottom of the form.
Click Create Estimate to save.
Send an estimate
After you save an estimate, you can send it to your client by email. The process is similar to sending an invoice.
Convert an estimate to an invoice
When your client approves the estimate, you can convert it into an invoice. The line items carry over so you do not need to enter them again.
If the scope of work changes, you can adjust the line items after you convert the estimate to an invoice.